One crucial modification that often gets overlooked is installing a Differential Breather Kit. Whether you're tackling bush terrain or crossing rivers, this modification is a must to ensure your 4x4's longevity and performance. When driving through rugged terrain your 4x4's differential and axle housing heat up, causing the oil inside to expand. Without proper ventilation, this expansion could create pressure within the cavity. This is where a diff breather kit comes into play. It acts as a pressure vent, preventing stress on your axle oil seals that can lead to costly repairs. +
In the factory setup, Differential Breathers are often positioned relatively low within the vehicle. This layout becomes problematic when you encounter water crossings, mud, and debris. These elements can clog the breathers, obstructing the airflow and causing pressure to build up inside the differential. The outcome? Premature failure of axle oil seals and potential damages that no off-road enthusiast wants to deal with.
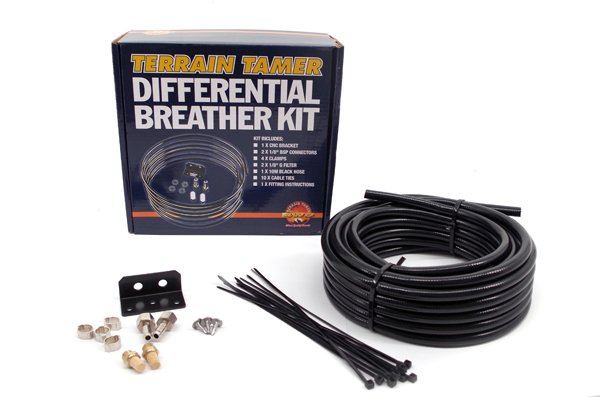
Designed to fit a variety of 4x4 models, this kit provides everything needed to perform the modification effectively. For instance, the kit includes 10 meters of hose, Differential Breathers, mounting hardware, cable ties, crimp fittings, and fitting instructions. While the kit comes with crimp fittings, swapping them with hose clamps can enhance the durability of your installation.
To start the installation, position the mounting bracket high in the engine bay, considering the route for the hose. This ensures that the hoses are kept away from the engine and exhaust heat. Installing the bracket on the firewall is a strategic choice. Once in place, secure it with self-tapping screws.
Begin by removing the rear Differential Breather. Pinch the clip on the axle housing, move it out of the way, and detach the tubing. Use a 12mm socket to undo the bolt holding the breather, and remove the entire assembly. Clean the barb fitting for the new installation.
For the rear Differential Breather, create a loop in the hose to accommodate axle articulation. Attach a hose clamp to one end and secure it onto the barb fitting. Route the hose along the chassis, cable-tying it to hard lines for stability. Continue routing until you reach the engine bay. Cut the hose to the desired length, attach the barb fitting, and secure the diff breather.
The process for the front Differential Breather is similar. Remove the old assembly, clean the barb fitting, and loop the hose. Attach the hose clamp and fix the barb fitting. Route the hose following the same principles as the rear Differential Breather, securing it with cable ties.
Trim excess cable ties and ensure that all hose clamps are properly secured. The installation of the extended Differential Breather Kit is complete. This seemingly simple modification can play a crucial role in preserving your differential and axle housing, preventing costly damages down the line.
*This is a guide only, we highly recommend an expert install this kit.
With the installation of an extended Differential Breather Kit, you're setting the stage for more memorable off-road adventures. By allowing your differential to breathe freely, you're reducing the risk of seal failures and ensuring that your 4x4 is ready to tackle any challenge that comes its way. Take the time to equip your vehicle with this invaluable modification—it's a small investment that can make a significant difference in your off-road journey.
A well-installed Differential Breather Kit from a reputable manufacturer like Terrain Tamer can be the key to unlocking the full potential of your 4x4 on and off the beaten path. You may also be interested in a Differential Repair Kit a id="hide-less" href="#read-more">Close
Part No: TTDBK
Universal Fit
Kit Includes: